TARGIT Period Table Task is a custom component for SQL Server Integration Services. The component assists in creating and maintaining complex period tables.
Main task solved
The Period Table task helps create and maintain period tables with a wide range of datetime based columns. When the task runs, the period table defined is dropped and re-created.
Installation
The TARGIT Period Table component is included in the "TARGIT Custom SSIS Tasks" installation package found in the TARGIT App & Gauge Store or the Download Center on the TARGIT Portal. After installation, a restart of SQL Server Data Tools and the SSIS project is required for the task(s) to appear in the SSIS toolbox.
How to use
Getting started
- In the SSIS package, create an ADO.NET connection manager for the SQL Server database if not already available
- Drag the Period Table task from the SSIS Toolbox to the package Control Flow
- Double click the task and select the ADO.NET connection created.
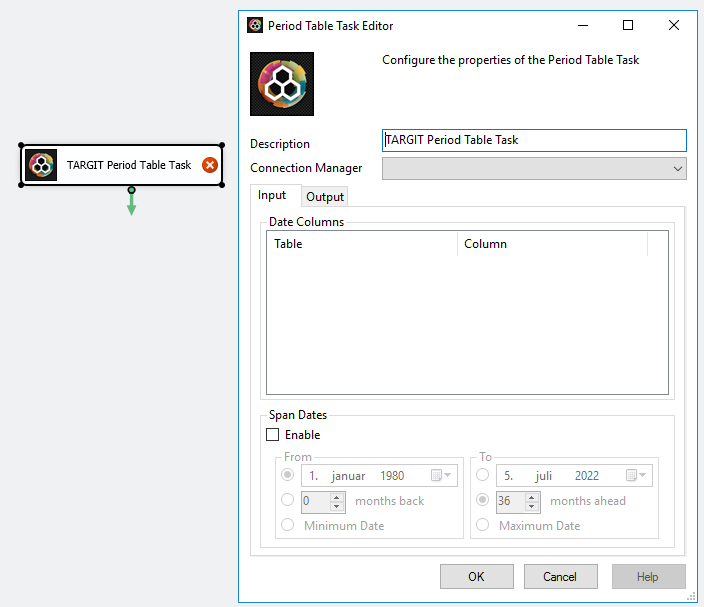
Input
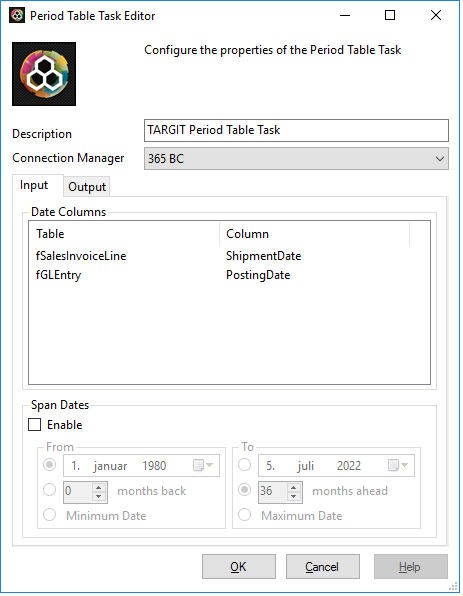
In the Input tab, the unique dates to be used for creating the period table are selected. If the table is to contain only unique dates from one or more database tables, add the tables and date columns to be included. Dates will be selected as unique and the timestamp part will be included, so be careful with large tables with unique dates as the period table can be unnecessarily large. Consider truncating the time part from dates in the input tables if time is not relevant.
The Span Dates function will inject any missing dates into the resulting period table in a selected interval if it is necessary to have all dates represented, e,g, for use with Balance at Date calculations. It can also be used for creating a period table without table inputs. This will results in a period table with all dates (without the time part) in the selected date range.
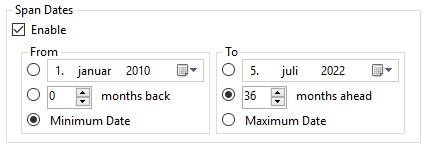
Span Dates - From
- Specific date: Adds dates from a specific start date. If input columns are selected, unique dates will be added from these, then any earlier dates added according to Span from date - if the span from date is earlier than the lowest input date.
- x Months back: Adds dates in the same way as with specific date, but sets the from date according to x months before today
- Minimum date: Spans dates starting with the earliest date in input columns
Span Dates - To
- Specific date: Adds dates up to a specific end date. If input columns are selected, unique dates will be added from these, then later dates added according to Span to date - if the span to date is later than the highest input date.
- x Months ahead: Adds dates in the same way as with specific date, but sets the to date according to x months after today
- Maximum date: Spans dates sending with the latest date in input columns
Output
In the Output tab, the properties and columns of the period table to be created are defined. Add a table name and the name of the primary date (datetime) column of the completed period table. The language selection defines available naming for e.g. month names.
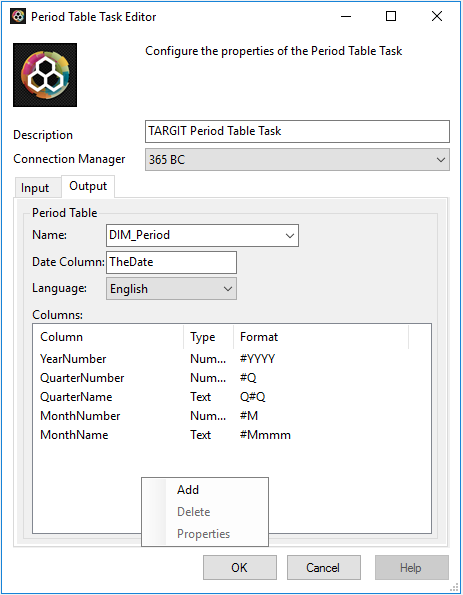
In Columns, any number of columns can be defined, all based on the list of input dates. A few simple columns are available when the task is first added, but there is no limit to the number of columns. A right click menu is available for managing the columns. Each column has a name, an output type, either Number of Text, and the formatting function describing what to calculate.
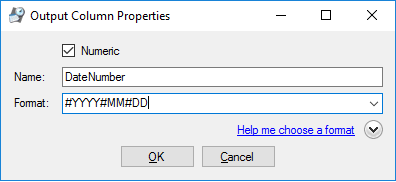
When a new column is added, a new window with the properties of the column pops up. To help define the column output format, use the format helper function. In the example, a numeric column called DateNumber is defined, which will return a full date of the format 20181123. In the Output column format box below, the list of available output column formats is shown.
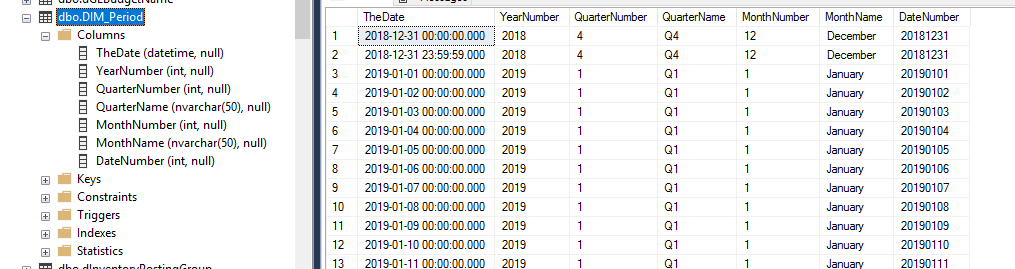
The period table resulting from the example definitions with DateNumber added:
- All TARGIT custom components connect to the SQL Server database using an ADO.NET connection
- In later Data Tools (Visual Studio) versions, check the TargetServerVersion property for the SSIS project if the TARGIT components do not show up in the SSIS Toolbox
- If the TARGIT components are not in the SSIS Toolbox after installation, a trouble shooting article is available (see Related articles)
- The TARGIT custom components are available for SQL Server versions beginning at 2005
- The components are free to use, but only officially supported for active TARGIT customers
Related articles